When I first started learning lighting techniques for photography, I thought it was all about making things brighter. But I quickly realized—light is everything. It sets the mood, shapes your subject, and tells the story before anyone even notices the composition. Whether I’m chasing golden hour or setting up flashes in a dim venue, every lighting choice adds emotion. In this post, I’ll walk you through the techniques I rely on to create everything from soft, romantic portraits to bold, dramatic shots.
Understanding the basics: Key lighting concepts for photographers
When I think about the core of great photography, lighting always comes first. Before you can tweak fancy setups or follow the latest trends, it’s vital to understand the fundamental lighting principles that shape every image.
For anyone stepping into portrait work in 2025, having a grip on basic terminology and concepts sets the stage for consistent results—no matter your gear.
Key lighting elements every photographer should know
- Light direction: The angle and path of your light source has a huge impact on your subject’s features and mood. Side lighting brings out texture, while front lighting gives a softer, more even look.
- Quality of light: Hard light creates sharp shadows and emphasizes details. Soft light—like you get on a cloudy day or with a big diffuser—smooths skin and gives portraits a natural, flattering feel.
- Intensity and exposure: How bright your light is affects mood and clarity. Learn to balance highlights and shadows so you don’t lose detail in either direction.
- Color temperature: Light sources have different color “casts”. Daylight, incandescent bulbs, and LEDs can all shift your image warm or cool. Getting this right is especially important for skin tones.
I always encourage photographers to notice how even small changes in light can shift the mood of a portrait—from dramatic to soft, bold to understated.
Experimenting with these basics helped me develop my style, and it’s a step I return to often. Mastering terms like key light, fill light, rim light, and background light opens up a toolkit for creative choices.

Essential tools and setups: From entry-level to professional gear
I get questions all the time about which lighting gear to start with and what to invest in as your skills grow. The good news is that you don’t need the fanciest equipment to create standout portraits. The essentials fall into a few groups: natural and artificial light sources, modifiers, and basic support gear. I’ll walk through each so you know what to expect at every level.
Natural light tools
When I work with sunlight, I rely on a few simple tools:
- Reflectors: These bounce sunlight or window light to fill shadows. Collapsible ones like the Neewer 5-in-1 are affordable and fold up for travel.
- Diffusers: Pure white translucent fabric can soften harsh daylight, making portraits more flattering. Many reflector kits include a diffusion panel.
- Black flags or cards: These block unwanted light and shape contrast, handy for controlling spill on sunny days or near big windows.
Artificial light sources
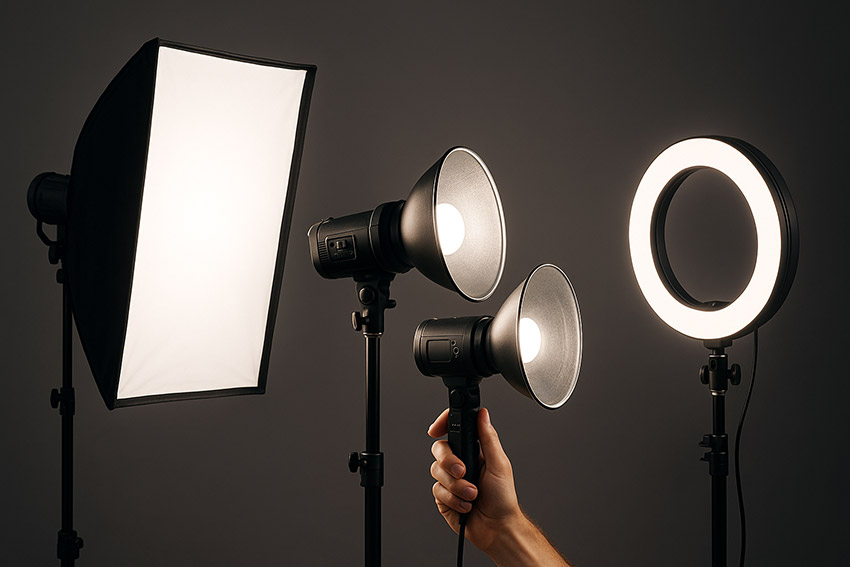
- Entry-level: Speedlights (like Canon or Godox models) are portable, battery-powered flashes. I started with just one and built my kit over time.
- Intermediate: Continuous LED panels (such as Aputure Amaran) allow you to see lighting in real time. They’ve become brighter and color-accurate in 2025 and pair well with softboxes.
- Professional: Studio strobes (like Profoto B10 or Godox AD200) offer more power and faster recycle speeds, perfect for freezing fast motion or shooting outdoors midday.
Modifiers and support gear
- Umbrellas and softboxes: These attach to lights to produce soft, even illumination. I suggest starting with a small umbrella for flexibility, then adding larger softboxes as you take on more complex jobs.
- Light stands and brackets: Even a basic set works when stability is key. I look for options tall enough for overhead lighting and sturdy enough to handle wind outside.
With just a reflector, one portable flash, and a reliable stand, I’ve crafted countless portraits from headshots to environmental work. As tech changes, I test new tools, but the core setup stays simple.
For a full overview of recommended gear and how to choose the right kit, see How to choose photography gear.

Best lighting techniques for portrait photography in 2025
After building a foundation in basic lighting, most photographers want to know which techniques actually work right now. In 2025, both technology and style are moving fast. Classic approaches are still reliable, but new trends and smart gear are changing how I approach every portrait session.
Core lighting setups for modern portraits
Whether I’m shooting inside or outside, these key setups help me get pro results:
- Rembrandt and loop lighting: Still some of the most flattering patterns, especially for single-light setups. I often use them to sculpt cheekbones and create natural, appealing shadows.
- Clamshell lighting: Perfect for beauty and headshots. A softbox above and a reflector or lower fill light below smooths skin and adds pop to the eyes.
- Backlight with rim separation: Using a backlight or kicker helps separate the subject from the background. It’s especially useful in bright outdoor settings or moody indoor shoots.
Trends and tech shaping 2025 portraits
- LED panels and smart modifiers: I use bi-color or RGB LEDs for their flexibility. Wireless control with apps makes real-time adjustments easy—even mid-shoot.
- Soft, cinematic lighting: Inspired by social media and editorial work, I lean on big softboxes and V-flats for subtle, even illumination. Many clients now ask for this style for its timeless look.
- Eco-friendly and portable gear: Lightweight, battery-powered lights let me travel light and set up almost anywhere.
For anyone starting out, I recommend practicing with just one main light and a reflector. As you grow, tools like wireless LED panels and flexible modifiers can save time and boost creativity.
Mastering natural light: Techniques for stunning outdoor and indoor portraits
When I work with portraits, I always start by reading the available light. Natural light gives a softness that’s hard to match, and learning to use it well means fewer technical hassles and more comfortable sessions for clients.
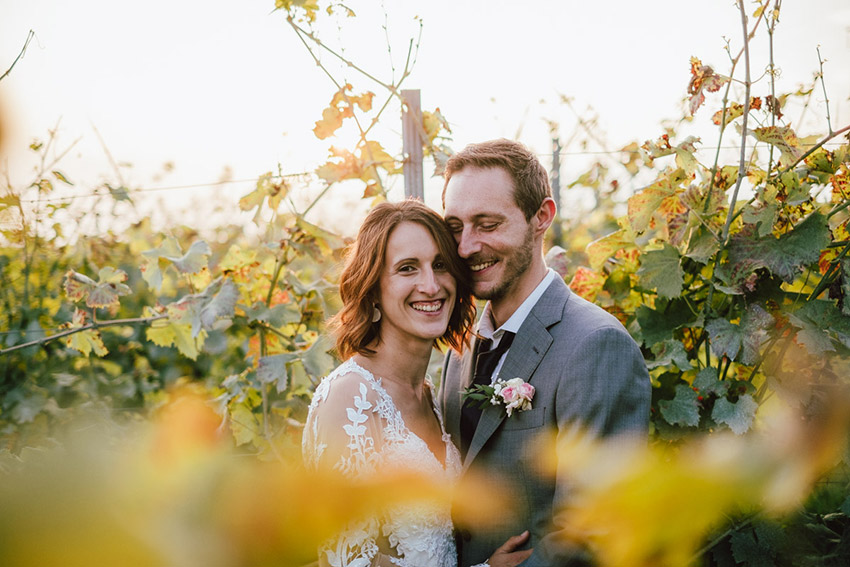
For outdoor portraits, I look for open shade—under trees or on the shadowed side of buildings—because diffused sunlight flatters skin and avoids harsh shadows. During golden hour, right after sunrise or before sunset, sunlight is warmer and lower, making every shot look more inviting and even.

Indoors, I get my best results positioning subjects near a large window. I often have them face the light, or just off-center, to keep the look natural but still dynamic.
If the sunlight is too intense, I hang a sheer curtain or even use a plain white shower curtain to diffuse it—this is a trick I picked up early in my career and still use regularly.
Moving the subject closer or further from the window changes shadow depth, so I adjust as needed while checking the back of my camera for balance between highlights and shadows.

Reflectors make a big difference by adding fill where natural light alone won’t cut it, especially under the eyes or chin. I always keep at least a collapsible reflector handy (silver for extra pop, white for soft fill), and sometimes enlist a friend or the client to help hold it.
Elevating your images with artificial lighting
Once I’m working in a space where natural light can’t deliver the look I want, I rely on artificial lighting to create results I can control no matter the setting. Knowing how and when to use strobes, continuous lights, and speedlights helps me create dramatic or soft portraits—even in challenging locations or at night.
Choosing your artificial light sources
I use strobes when I want enough power to overpower the sun outdoors or freeze quick movements indoors. The crisp burst is perfect for sharp, well-defined portraits. If I need to see the light in real time, especially for adjusting my setup with clients, I prefer continuous LED panels. These make it easy to balance ambient room light and pick up subtle changes in direction or intensity. For pure portability and flexibility, I always keep a speedlight or two in my bag. Modern flashes sync wirelessly and recycle fast enough for most sessions.
Creative modifiers for more control
Modifiers shape how the light hits my subject. I often use a softbox or octabox for wide, even light. Sometimes, I’ll add a grid or barn doors to prevent spill and add drama or separation from the background. When I want a punchier look, beauty dishes give me crisp highlights—especially useful in beauty or fashion portraits. Colored gels add mood, while V-flats create wraparound fill for large group shots.
Common mistakes in lighting techniques for photography and how to avoid them
Over the years, I’ve seen the same lighting issues hurt portrait results—even after clients did everything else right. Knowing what to watch for gives you an edge before you even press the shutter.
- Harsh shadows and blown highlights: Many new photographers forget how strong sunlight or undiffused flash can create unflattering lines on faces, or lose detail in bright spots. I always check for even exposure by using my camera’s highlight warnings and either diffusing direct light or moving my subject into open shade.
- Underexposed subjects: It’s tempting to trust available light, but sometimes the background gets brighter than your subject. I fix this with a reflector or a quick bump in exposure compensation, making sure faces remain the focus of every shot.
- Mismatched color temperatures: Mixing window light with indoor bulbs or using multiple light sources without setting white balance can leave skin tones looking off. I always choose a single light source when possible and set my custom white balance before I start.
- Ignoring catchlights: Without a reflection in the subject’s eyes, portraits feel flat and lifeless. A slight turn of the head or repositioning your light can create natural sparkle in the eyes every time.
I learned most of these lessons the hard way—but these habits make a big difference as you refine your style.
Actionable workflow tips: Lighting for speed and efficiency
Streamlining your lighting workflow on tight schedules
When I work with clients, speed and flexibility are just as important as the technical side of lighting. Getting set up quickly and adapting to shifting conditions helps me keep sessions relaxed and get more out of each shoot.
Here are the approaches I rely on to work faster without losing image quality.
- Standardize your kit: I pack only the gear I know I’ll use. My go-to is one main light, a solid stand, a softbox, and a reflector, with batteries charged and backups close. This reduces setup decisions and lets me focus on directing my subject.
- Preset lighting patterns: Before a session, I mentally review my favorite setups—like Rembrandt or clamshell. I can quickly position gear and tweak on the fly. Marking tripod or light stand spots with tape means I can reset or switch looks in moments.
- Adapt to changes instantly: Weather shifts or client requests can happen anytime. For outdoor shoots, I start in open shade, but I keep a small translucent diffuser and a silver reflector handy if the sun breaks out or clouds roll in. Indoors, window light is my default, but I always know where the outlets are for fast plug-in of a speedlight or LED panel.
Creative lighting techniques for photography under pressure
Maintaining creativity under pressure matters too. When I feel rushed, I use simple prompts—changing the orientation or distance of my main light, swapping from silver to white reflector, or letting a client move naturally in the set light.
Over time, I’ve built templates and checklists for common jobs, which I share through resources on Jestfocus to help others speed up their own process.
If you’re interested in growing your business and improving workflow, check out Pricing templates for photographer: checklist to grow your business. Structure saves time, but leaving room for creative problem-solving keeps every session fresh and personal.
Growing your business with better lighting techniques for photography
How lighting lifts your business and portfolio
When I look back on my own journey, mastering lighting techniques for photography pushed my work to a new level and brought more business opportunities. Great lighting does more than make portraits technically correct—it gives every image a signature look. That’s what helps photographers stand out in a crowded field.
Here’s what I noticed when I invested time in lighting:
- Portfolio impact: Consistently well-lit photos became the highlight of my website and printed samples, drawing in more inquiries. Stylized light choices—whether soft and natural or bold and sculpted—showed potential clients what made my photos unique.
- Client satisfaction: Clients love seeing themselves in flattering light. When people feel good about their images, they recommend me to others, return for new sessions, and often leave positive reviews. Smoother sessions with confident use of lighting also put clients at ease, leading to more authentic expressions.
- Pricing and brand value: Quality lighting justifies higher rates, since clients associate professional results with premium service. As I refined my techniques, I felt more confident raising my prices—and could clearly demonstrate the difference to clients.
I often mention on Jestfocus how simple improvements—like learning to spot color casts or experiment with modern modifiers—can change both your art and your business. Lighting is the lever that elevates your craft, brings in better clients, and gives you the confidence to grow year after year.
How to master lighting in photography?
After working with so many photographers, I see the same challenges come up—balancing creative lighting with business demands, finding trusted advice, and keeping up with what the market expects. I started Jestfocus to answer those needs in plain language, so every photographer can build both their technical skills and a stronger business foundation.
Learning through honest experience and real-world guides
On Jestfocus, I break down not just gear recommendations or technical how-tos, but also share practical workflows that save time and reduce errors.
When I test a lighting setup or try new gear, I share photos, step-by-step notes, and the reasoning behind every choice. It’s all rooted in real experience from hundreds of sessions—both the wins and the mistakes.
Building business skills alongside creative growth
Lighting mastery alone won’t grow a client base or boost rates. That’s why Jestfocus also tackles business essentials such as pricing, portfolio curation, workflow automation, and communicating with clients.
Many of the articles and checklists I post are tools I use in my own business. Whether you need lighting tips or want to streamline billing, I aim to give practical, relatable advice you can apply right away.
If you need dependable insight on both lighting techniques for photography and business—tested by a working wedding photographer—Jestfocus is designed for that. Every resource comes from my own journey, so you can skip years of trial and error and focus on the parts of photography you enjoy most.
Next steps to mastering lighting techniques for photography
Building real skill through practice
If you made it this far, you know that mastering lighting techniques for photography isn’t about memorizing setups—it’s about practicing these fundamentals until they feel natural. Every great portrait I’ve made came from trying new approaches, making mistakes, and learning what works for different faces, locations, and times of day.
Pick one lighting concept from this guide that excites you and apply it to your next shoot. Even a basic reflector can transform results when you notice how it shapes the light on your subject.
Keep learning and refining your craft
Staying sharp as a photographer means always updating your skills. Lighting trends keep shifting and clients expect more variety each year. I rely on a mix of trusted sources when I want to stay on top of new gear or ideas:
- Official manufacturer tutorials for lighting systems, like Profoto or Godox
- YouTube channels from working photographers (ex: Lindsay Adler, Sean Tucker)
- Articles and guides from sites that focus on both technique and business, like Fstoppers or SLR Lounge
- Online forums like DPReview or photography subreddits for real-world problem solving
If you want step-by-step business advice, see How to start a photography business. I want you to have somewhere to turn when the usual advice isn’t enough or when you need a nudge to try something different.
Looking ahead: Making lighting your signature
What sets strong photographers apart is not just the camera or light they use, but how they use lighting to create a recognizable style. Many of the photographers I admire built their reputations on creative control with lighting—whether soft, cinematic looks or bold, dramatic contrasts.
Start small, try new modifiers, and revisit your best work to spot what you love. As you refine your style, you’ll see more consistent results and attract clients who want your look specifically.
If you want help building good habits, streamlining your photography business, or tackling new portrait challenges, that’s what I focus on each week at Jestfocus.
Browse the guides, join in the conversations, and keep pushing your lighting further. Each step adds up—and your portfolio (and client list) will show it.


